One of a most popular solutions to manage a business is to use the capabilities of the Bitrix24 service. In this article we will show, how to configure DNS records for your domain in several steps.
1. Change the name servers in the domain
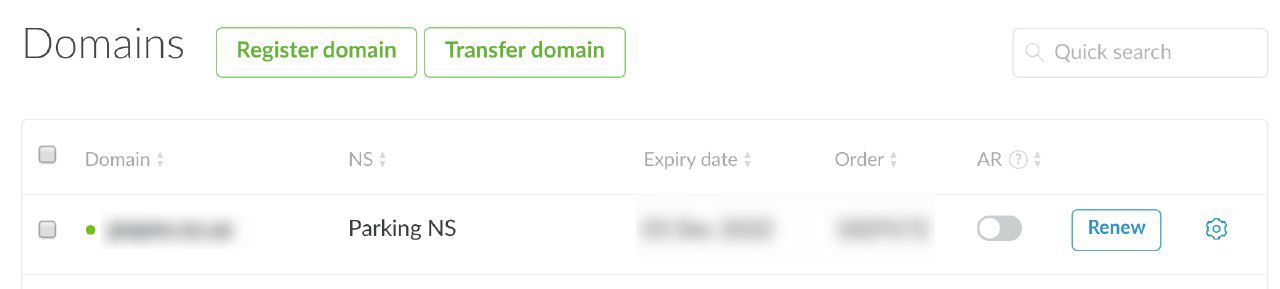
First, go to the "Domains" section and click on the gear next to the order (on the right side).
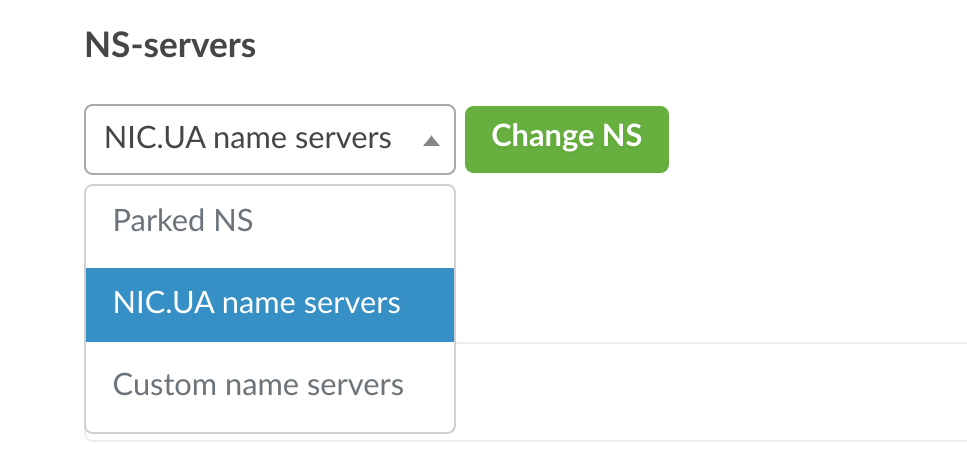
Then select “NIC.UA Name Servers” from the list in the “NS Servers” section. Then click on the “Change NS” button and wait for the page to load.
2. Editing of DNS records on name servers
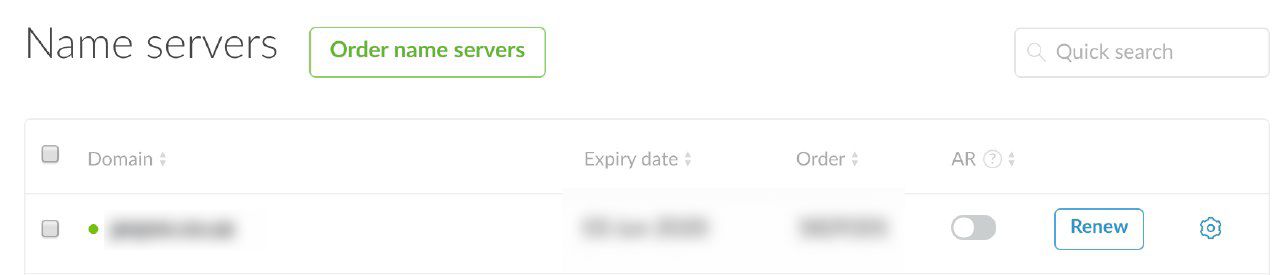
In the column on the left of the screen go to the "Name Servers (NS)" section and click on the gear next to the order.
Then, next to the “DNS Records” heading, click “Change”.
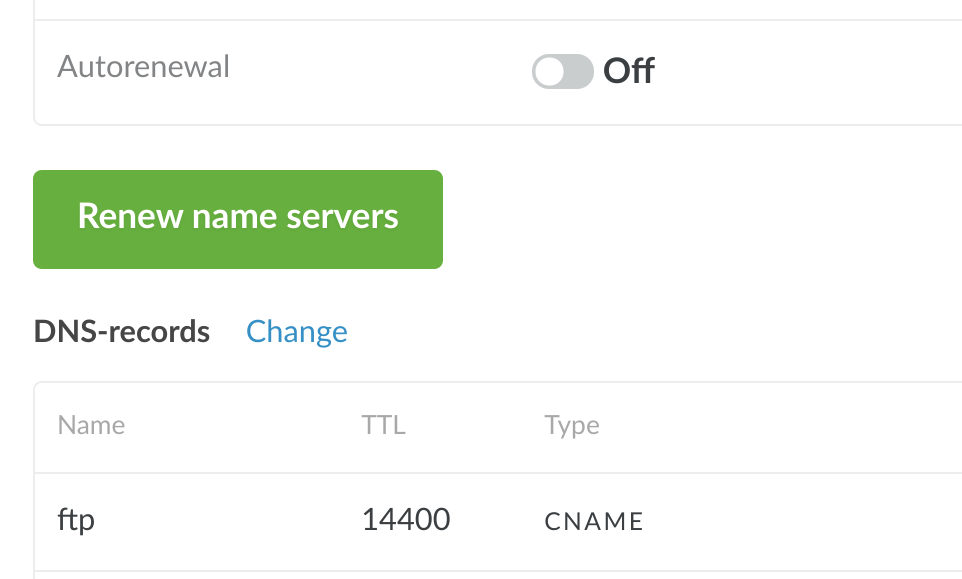
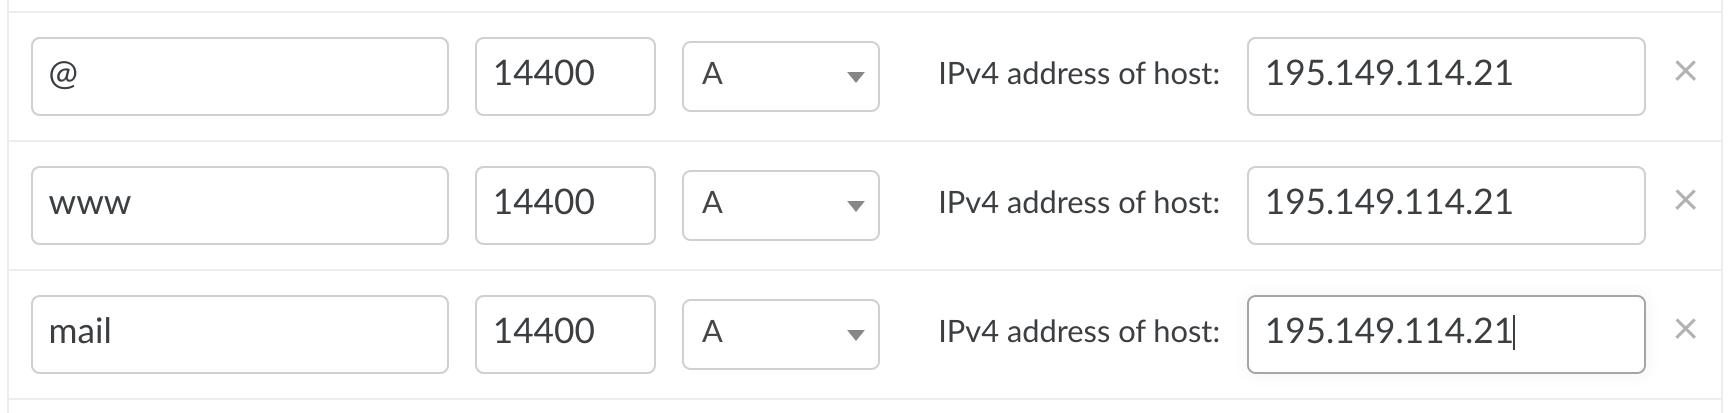
First of all, delete A records with the names '@' and 'www'.
Then add new entries. For domains of the second and third level of record settings are different.
1. For third-level domains:
- Name: www
- Type: CNAME
- Host alias: lb.bitrix24.site.
- Name: @
- Type: Permanent Redirect
- URL: https://example.net.ua (instead of 'example.net.ua' specify the name of your domain)
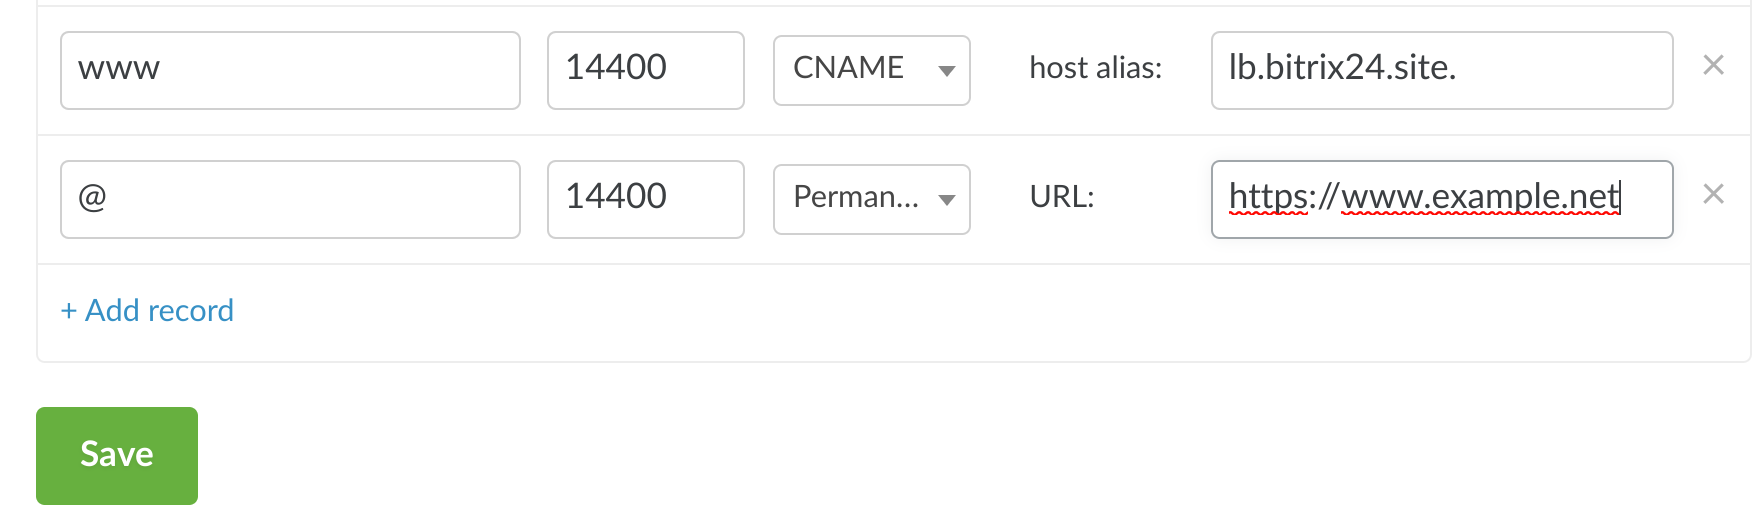
The value in the TTL field can be left by default: 14400 sec. or select your own value (at least 3600 sec.)
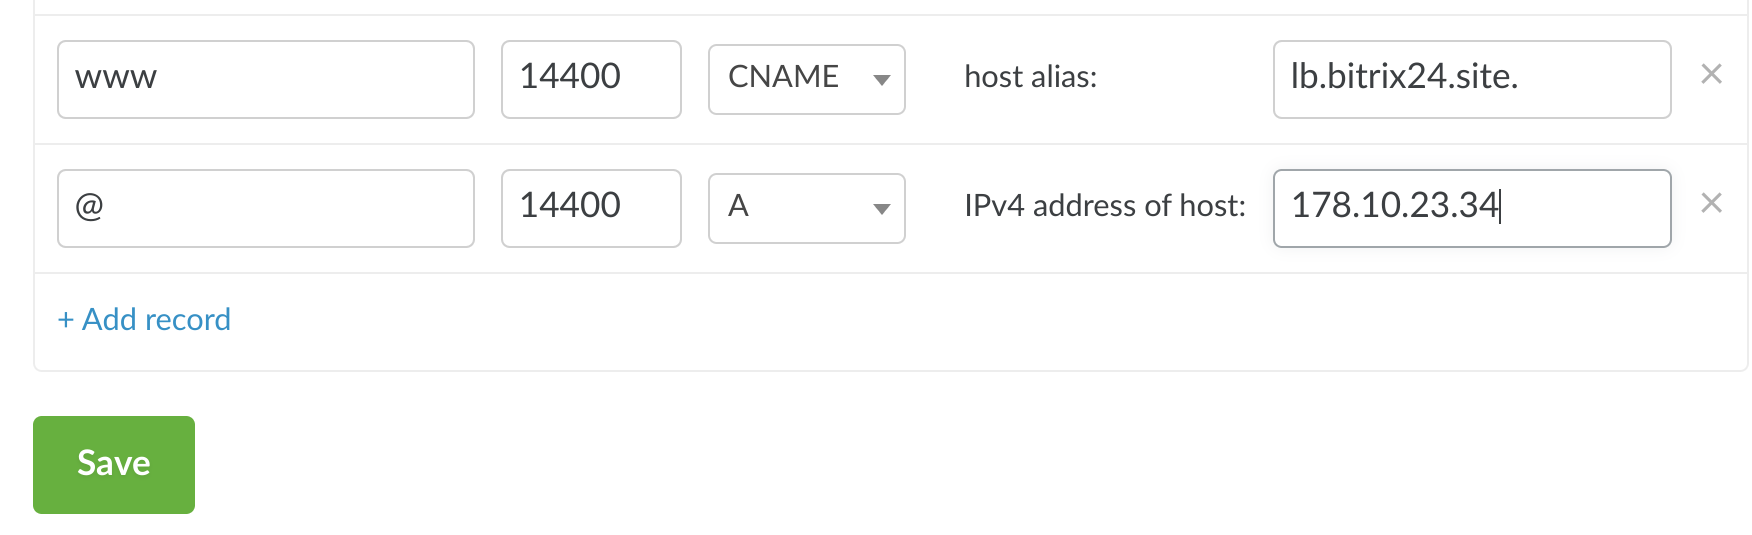
2. For second level domain names
- Name: @
- Type: A
- Host alias: enter the received IP address in Bitrix24
- Name: www
- Type: CNAME
- Host alias: lb.bitrix24.site.
After filling in the fields, click the "Save" button. The changes will take effect within 4-24 hours when the DNS cache of the Internet providers is updated.
Oleksii Momot
Comments